1. Introduction
Brookies, the ultimate combination of brownies and cookies, are a dessert lover’s dream. If you’re wondering how to assemble a brookie perfectly, this guide provides all the steps, tips, and creative ideas you need. From achieving distinct layers to ensuring even baking, assembling a brookie is as rewarding as it is delicious.
Assembling a brookie may seem simple, but achieving the perfect balance between the two layers requires careful preparation and attention to detail. From selecting the right ingredients to ensuring even baking, every step plays a crucial role in crafting this dessert masterpiece.
This guide provides a comprehensive step-by-step process to help you assemble the perfect brookie. Whether you’re a seasoned baker or trying it for the first time, these tips and tricks will ensure your brookies turn out flawless every time.
2. Understanding Brookies: Learn How to Assemble a Brookie
Before diving into the assembly process, it’s essential to understand what makes a brookie unique. From its components to its appeal, this section lays the foundation for crafting this hybrid dessert.
2.1 What Is a Brookie? Learn How to Assemble It
Understanding how to assemble a brookie starts with knowing its two core components: brownies and cookies. This hybrid dessert typically features a rich, fudgy brownie base topped with a layer of chewy, sweet cookie dough. Together, these layers create a dessert that offers the best of both worlds.
Origins and Popularity:
Brookies emerged as a creative twist on traditional desserts, gaining popularity in bakeries and home kitchens alike. Their versatility allows for endless customization, making them a favorite choice for celebrations, casual gatherings, and everything in between. To understand brookies better, refer to the Brookie Recipe: Perfect Brownie Cookie Bars.
2.2 The Components of a Brookie
The magic of a brookie lies in its two distinct layers, each bringing unique textures and flavors to the dessert.
1. Brownie Layer:
- Texture: Dense, fudgy, and chocolatey.
- Ingredients: Cocoa powder, sugar, butter, eggs, and flour.
- Role: Forms the base, providing a sturdy and flavorful foundation for the cookie layer.
2. Cookie Layer:
- Texture: Soft, chewy, and slightly crispy on the edges.
- Ingredients: Butter, sugar, eggs, flour, and chocolate chips.
- Role: Adds sweetness and a contrasting texture to the dessert.
Variations:
Brookies can be customized with additional flavors and ingredients:
- Swirls: Marbled patterns created by mixing the two layers.
- Mix-ins: Nuts, caramel, or marshmallows for added flavor and texture.
- Frostings: A layer of ganache or buttercream for an extra indulgent finish.
With these foundational elements in mind, let’s move on to the tools and preparation required for assembling brookies.
3. Preparing for Assembly: Steps to Assemble a Brookie
Creating the perfect brookie begins with proper preparation. From gathering the right tools to preparing the individual layers, this section covers everything you need before the actual assembly.
3.1 Tools and Equipment Needed
Having the right tools on hand ensures a smooth baking process and professional results. Here’s what you’ll need:
Essential Tools:
- Baking Pan: Choose a square, rectangular, or round pan based on your desired shape. Non-stick pans or those lined with parchment paper work best.
- Mixing Bowls: Use separate bowls for brownie batter and cookie dough to avoid mixing flavors prematurely.
- Spatula: For spreading and leveling layers evenly.
- Measuring Tools: Cups and spoons for accurate ingredient measurements.
- Whisk and Electric Mixer: A whisk for dry ingredients and a mixer for combining wet and dry components.
Preparation Tips:
- Preheat your oven to 325–350°F to ensure even baking.
- Line your pan with parchment paper for easy removal and clean edges.
- Prepare your workspace with all tools and ingredients within reach.
3.2 How to Assemble a Brookie Starting with the Brownie Layer
The brownie layer serves as the base of the brookie, providing structure and a rich, chocolatey flavor. Follow these steps to create a perfect brownie layer:

Ingredients:
- 1/2 cup unsalted butter, melted
- 1 cup granulated sugar
- 2 large eggs
- 1/3 cup unsweetened cocoa powder
- 1/2 cup all-purpose flour
- 1/4 teaspoon salt
- 1/4 teaspoon baking powder
Steps to Prepare:
- Melt the butter and mix it with the sugar in a bowl until smooth.
- Add the eggs one at a time, beating well after each addition.
- Sift the cocoa powder, flour, salt, and baking powder together. Slowly mix these dry ingredients into the wet mixture until just combined.
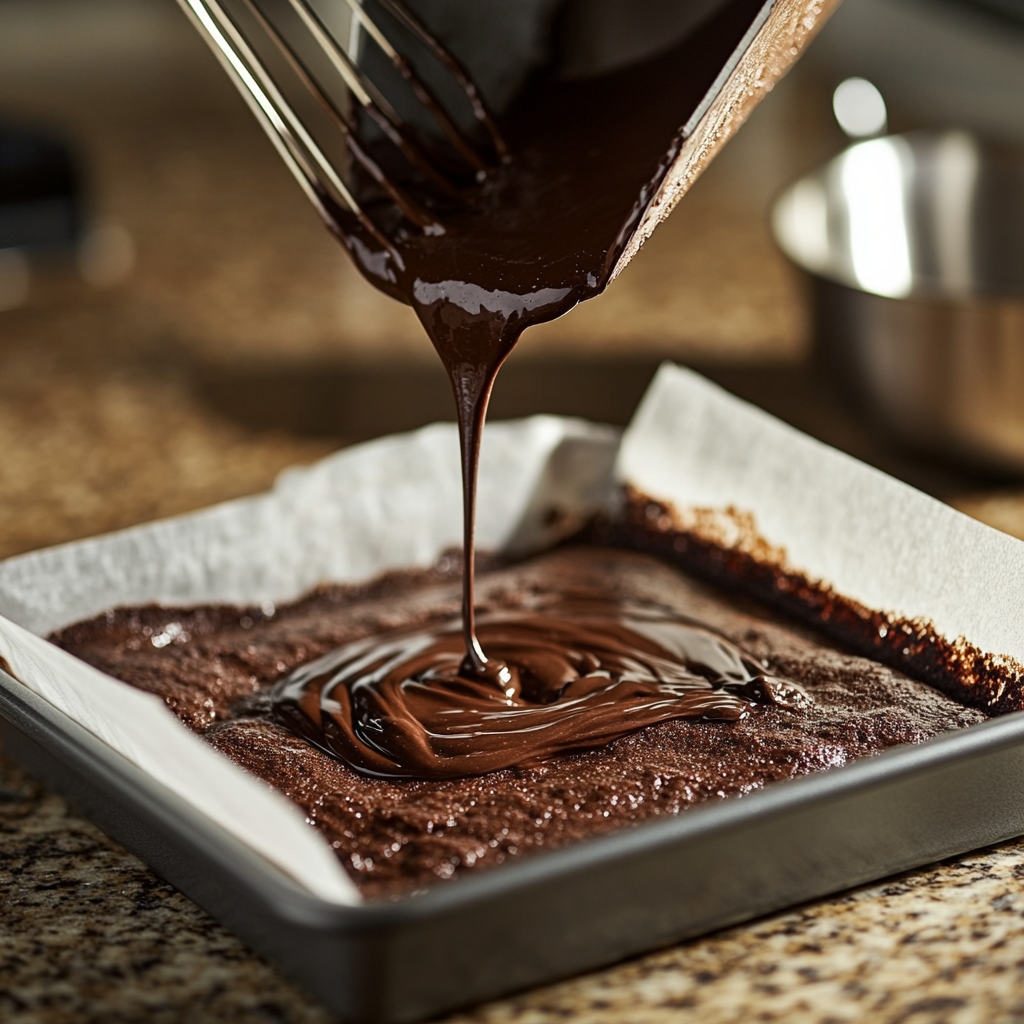
- Pour the brownie batter into the prepared pan and spread evenly with a spatula.
Pro Tip: To achieve a fudgier texture, underbake the brownie layer slightly by reducing the baking time by 2–3 minutes.
3.3 Preparing Cookie Dough for Assembling a Brookie
The cookie dough adds a chewy, sweet contrast to the brownie base. Here’s how to prepare it:
Ingredients:
- 1/2 cup unsalted butter, softened
- 1/2 cup granulated sugar
- 1/2 cup packed brown sugar
- 1 large egg
- 1 teaspoon vanilla extract
- 1 1/4 cups all-purpose flour
- 1/2 teaspoon baking soda
- 1/2 teaspoon salt
- 1 cup semi-sweet chocolate chips
Steps to Prepare:
- Cream the butter and sugars together until light and fluffy.
- Beat in the egg and vanilla extract until fully incorporated.
- In a separate bowl, mix the flour, baking soda, and salt. Gradually add this dry mixture to the wet ingredients.
- Fold in the chocolate chips. Chill the dough in the refrigerator for at least 20 minutes to make it easier to layer.
Pro Tip: Chilled cookie dough holds its shape better during baking, preventing the layers from blending. For insights into cookie dough ingredients, visit Ingredients in Nestle Cookie Dough.
4. Step-by-Step Guide on How to Assemble a Brookie
Assembling a brookie is where the magic happens. Proper layering ensures a visually appealing and well-textured dessert. Follow these steps for foolproof assembly.
4.1 Step-by-Step Guide on How to Assemble a Brookie
This section provides a detailed guide on how to assemble a brookie with professional results.

Steps for Layering:
- Prepare the Brownie Base:
- Pour the brownie batter into the lined baking pan.
- Use a spatula to spread it evenly, ensuring the edges are filled.
- Add the Cookie Dough Layer:
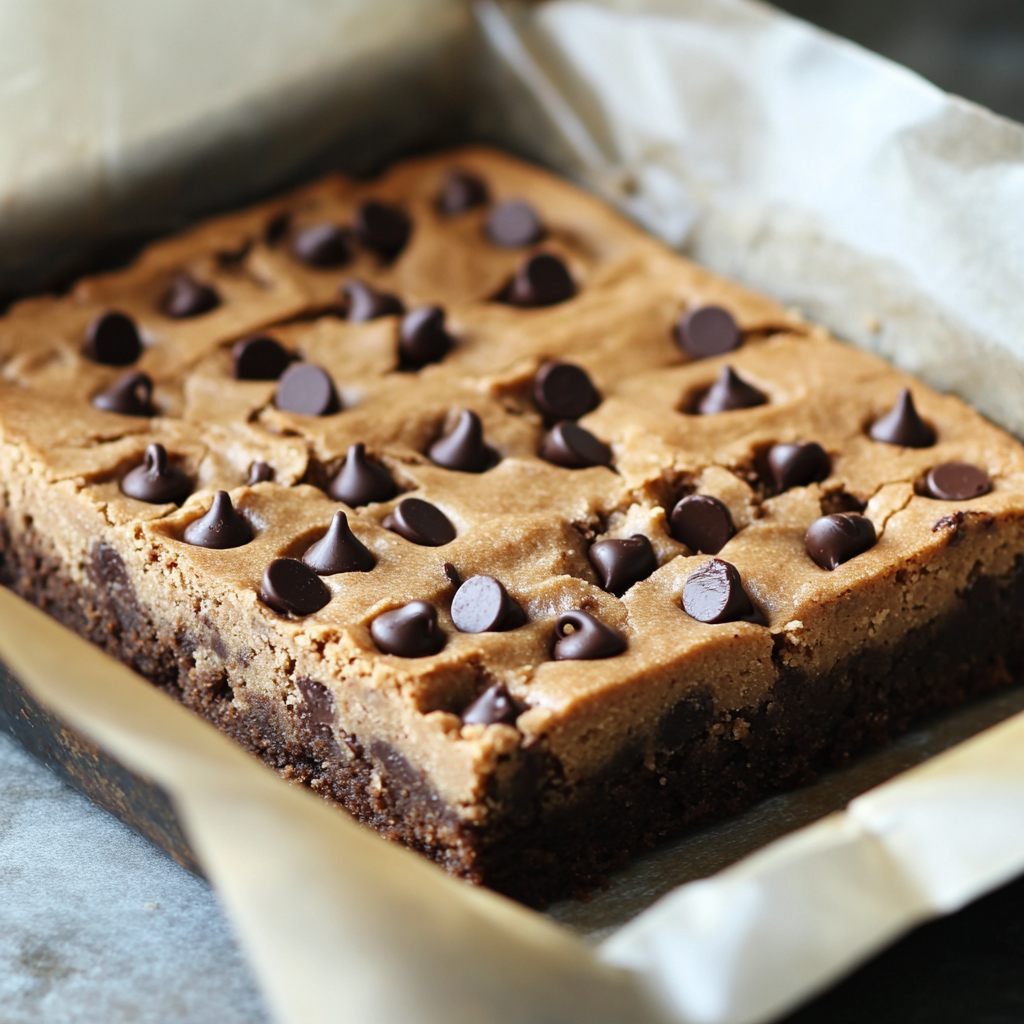
- Take the chilled cookie dough and scoop small portions onto the brownie batter.
- Gently press the dough down with your fingers or the back of a spoon. Avoid spreading too hard to maintain the distinct layers.
- Smooth the Top Layer:
- For a polished look, flatten the cookie dough layer gently using a spatula. Ensure it covers the brownie batter completely.
Pro Tip: If desired, sprinkle extra chocolate chips or nuts on top of the cookie layer for added texture and flavor. For more tips on creating perfect dessert layers, visit Tips for Layering Desserts.”
4.2 Creative Twists for Assembling a Brookie
Brookies are versatile and lend themselves well to creative customizations. Consider these ideas to elevate your dessert:
1. Swirling for a Marbled Effect:
- Use a skewer or toothpick to create swirls by gently dragging it through the brownie and cookie layers. This creates a marbled pattern and blends the flavors subtly.
2. Adding Extra Layers:
- Alternate thinner layers of brownie batter and cookie dough for a stacked effect. This approach works well in loaf pans or ramekins.
3. Mix-In Additions:
- Layer caramel, peanut butter, or marshmallow fluff between the brownie and cookie layers for a gooey surprise.
Pro Tip: Use a piping bag for even distribution of soft add-ins like caramel or marshmallow. Explore more creative twists in baking by checking out Creative Baking Tips.
4.3 Baking Tips to Perfectly Assemble a Brookie
Achieving evenly baked brookies requires attention to oven settings and techniques.
Baking Tips:
- Temperature Control:
- Bake at 325–350°F for consistent results. A lower temperature prevents the cookie layer from over-browning while allowing the brownie layer to cook thoroughly.
- Foil Covering:
- If the cookie layer starts browning too quickly, cover the pan loosely with aluminum foil during the final 10 minutes of baking.
- Testing Doneness:
- Insert a toothpick into the brownie layer. If it comes out with a few moist crumbs, the brookie is done. Avoid overbaking to maintain a fudgy texture.
Pro Tip: Let the brookie cool completely in the pan before slicing to prevent crumbling or layer separation.
5. Troubleshooting Issues While Assembling a Brookie
Even experienced bakers can encounter challenges when assembling brookies. Here are solutions to some of the most common problems, ensuring your dessert turns out perfectly every time.
5.1 Layers Mixing Together
One of the key challenges in brookie assembly is maintaining distinct brownie and cookie layers.
Causes:
- The cookie dough wasn’t chilled before layering.
- The brownie batter was too runny or over-mixed.
- Excessive pressure was applied while spreading the cookie dough.
Solutions:
- Chill the cookie dough for at least 20 minutes to firm it up before layering.
- Ensure the brownie batter is thick but spreadable by following the recipe closely.
- Gently place the cookie dough on top without pressing too hard.
Pro Tip: Use a cookie scoop to distribute dough evenly, minimizing the need for spreading.
5.2 Uneven Baking
Unevenly baked brookies can result in undercooked centers or overcooked edges, affecting texture and taste.
Causes:
- Oven temperature was inconsistent.
- The pan size or material wasn’t suitable.
- The layers were too thick, preventing even heat distribution.
Solutions:
- Use an oven thermometer to ensure the correct baking temperature.
- Opt for a metal pan, which conducts heat more evenly than glass or ceramic.
- Avoid making layers excessively thick; aim for equal distribution of brownie and cookie dough.
Pro Tip: Rotate the pan halfway through baking for more even results. Learn how to avoid common baking mistakes with these Common Baking Mistakes insights.
5.3 Sticking to the Pan
Sticking can ruin the brookie’s appearance and make it difficult to remove from the pan.
Causes:
- The pan wasn’t properly greased or lined.
- The brookie wasn’t allowed to cool before removing.
Solutions:
- Always line the pan with parchment paper, letting the edges overhang for easy lifting.
- Grease the sides of the pan lightly to prevent sticking.
- Allow the brookie to cool completely before attempting to remove or slice it.
Pro Tip: For clean cuts, use a sharp knife and wipe it between slices.
6. Serving and Storing: After You Assemble a Brookie
Once your brookie is baked to perfection, knowing how to serve and store it properly will ensure you enjoy it at its best.
6.1 How to Serve Brookies
Brookies are versatile and can be presented in various ways, depending on the occasion.

Serving Suggestions:
- Classic Squares or Bars:
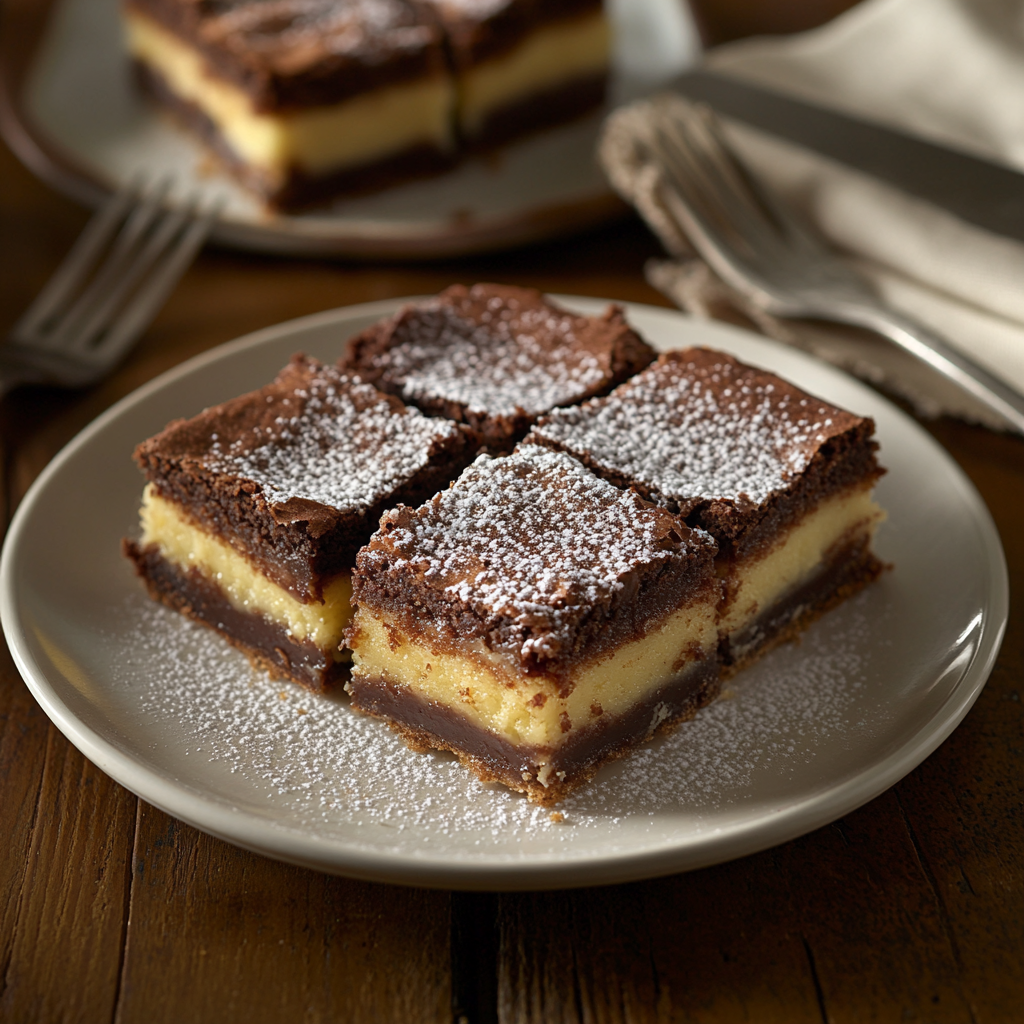
- Use a sharp knife to cut the brookie into squares or rectangular bars.
- Perfect for casual gatherings or as a grab-and-go treat.
- Warm with Ice Cream:
- Serve a slightly warmed brookie with a scoop of vanilla or caramel ice cream for an indulgent dessert.
- Drizzle with chocolate or caramel sauce for added flavor.
- Individual Portions:
- Use cupcake tins to create single-serving brookies.
- Ideal for parties and portion control.
Pro Tip: Dust brookies with powdered sugar or cocoa powder for a simple yet elegant finish.
6.2 Storing Brookies
Proper storage ensures that your brookies stay fresh and delicious for days—or even weeks if frozen.
Short-Term Storage:
- Place brookies in an airtight container at room temperature.
- They stay fresh for up to 5 days.
Refrigeration:
- Store brookies in the refrigerator if they contain perishable ingredients like cream cheese frosting.
- Keep them in an airtight container to prevent dryness, and consume within a week.
Freezing for Longer Storage:
- Wrap individual brookie squares tightly in plastic wrap, then place them in a freezer-safe bag or container.
- Frozen brookies can last up to 3 months.
Thawing Instructions:
- To enjoy, remove a frozen brookie and let it thaw at room temperature for 1–2 hours.
- Alternatively, warm it in the microwave for 10–15 seconds for a fresh-from-the-oven taste.
Pro Tip: Label the storage container with the date to track freshness easily. For calorie-conscious storage ideas, check How Many Calories in a Brookie Cake?.
7. FAQs About Assembling Brookies
Brookies are a popular dessert, but bakers often have questions about assembly, customization, and troubleshooting. Here are answers to some of the most frequently asked questions to help you perfect your brookie-making skills.
7.1 General Assembly Questions
If you have questions about how to assemble a brookie, this FAQ section has the answers.
1. Can I use premade mixes for brookies?
Yes, premade brownie and cookie mixes can simplify the process. However, ensure they are of similar consistency to maintain distinct layers.
2. Should I chill the brownie batter before layering?
No, the brownie batter should remain spreadable. Chilling it may make layering difficult and lead to uneven baking.
3. What’s the best way to prevent the layers from blending?
Chill the cookie dough and gently place it over the brownie batter without pressing too hard. Use a spatula to spread it evenly.
4. How do I ensure even baking for thick layers?
Bake at a lower temperature, such as 325°F, and extend the baking time slightly. Cover the top with foil if it starts browning too quickly.
7.2 Customization Questions
5. Can I add other flavors like peanut butter or caramel?
Absolutely! Swirl peanut butter or caramel into the brownie batter or layer it between the brownie and cookie dough for added richness.
6. What’s the ideal pan size for brookies?
A 9×9-inch square pan works best for balanced layers. For thicker brookies, opt for an 8×8-inch pan.
7. Can I make gluten-free brookies?
Yes, substitute all-purpose flour with gluten-free flour blends for both the brownie and cookie layers.
7.3 Troubleshooting and Storage Questions
8. How do I know if my brookie is fully baked?
Insert a toothpick into the brownie layer. If it comes out with a few moist crumbs (not wet batter), it’s done.
9. Why do my layers separate after baking?
This can happen if the brownie layer is underbaked. Ensure the bottom layer has set before adding the cookie dough.
10. Can I assemble brookies ahead of time?
Yes, you can assemble and refrigerate them unbaked for up to 24 hours. Allow them to reach room temperature before baking.
8. Conclusion
Brookies are a delightful fusion of two beloved desserts, combining the rich, chocolatey decadence of brownies with the sweet, chewy goodness of cookies. Assembling the perfect brookie requires attention to detail, from preparing the layers to ensuring even baking. However, with the right tools, techniques, and a touch of creativity, you can craft a dessert that is as visually appealing as it is delicious.
This guide has walked you through the essential steps, troubleshooting tips, and serving ideas to help you master the art of assembling brookies. Whether you’re baking for a party, a special occasion, or simply to satisfy your sweet tooth, brookies are sure to be a crowd-pleaser.
So, preheat your oven, gather your ingredients, and start layering! Remember, the joy of baking is in the process—and the reward is in every delicious bite.
